
For smaller blogs, WordPress’s built-in content structure works fine. As your site grows, you need an easier way to create and manage a scalable site. Custom fields in WordPress lets you bypass the more rigid built-in content structures and maintain a consistent strategy catered to your site. Plus, every site’s not the same, so why should you get stuck only using WordPress’s built-in fields?
Why Scalability Matters in WordPress
Scalability isn’t about traffic. Even smaller sites benefit from a scalable site structure. Instead, it’s all about content complexity. You might start with basic blog posts, but move on to product listings, case studies, reviews, location-based posts, and much more.
To keep a consistent layout throughout your site for different types of content, you have to manually edit every single post or rely on bloated themes to try and handle your needs.
If you don’t prep your site to scale early on, it gets more difficult to go back and manage past posts. The sooner you set up custom fields in WordPress, the easier it is to create a consistent content management strategy, especially if you start adding more team members and editors.
What Exactly Are Custom Fields?
Custom fields are key-value pairs that let you add extra metadata to your posts, pages, and even custom post types. Without them, you’re left cramming everything into the main editor, which gets messy quick.
Use custom fields to add metadata, such as pricing, writer names, dates, locations, call-to-action button details, and much more. Add pretty much any field you need to consistently manage and organize content.
Think of custom fields as a way to define parts of your text, turning it into data versus just simple text. And, this lets you consistently define these parts across all your posts and pages as you create them.
Planning the Content Model
Creating custom fields in WordPress haphazardly won’t help your site at all. Instead, plan your content model first. Think about the types of content your site publishes now and what you plan to scale to in the future. For example, you might only publish reviews now, but if you plan to start selling products soon, you’d want to add fields related to products, pricing, etc.
Break each type of content you’ll publish into individual fields. Each field should only contain one piece of data. For instance, a product review might include:
- Price
- Rating
- Pros
- Cons
- Features
- Summary
Then, create a consistent naming strategy for your fields to keep things organized. It’s also a good idea to create custom fields that work across multiple entries, not just a one time use on a single page.
Remember, you can always go back and add more or make changes. Just have a clear strategy in place to start with to make it easier to scale later.
Implementing Custom Fields in WordPress
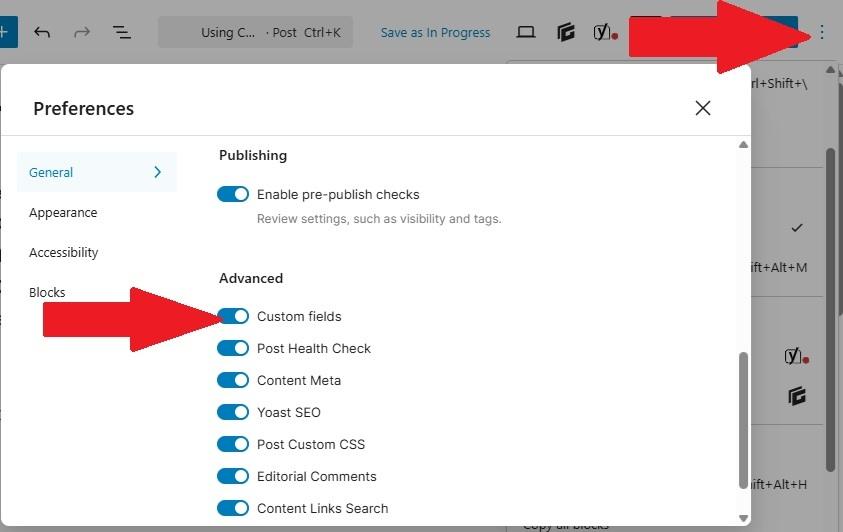
WordPress does have a built-in way to add custom fields, but it’s not pretty. Depending on your version of WordPress, you’ll have to enable custom fields by opening a new or existing post in the editor going to Screen Options and checking Custom Fields. Or, use the three dot menu, select Preferences, and turn on Custom Fields in the General section.
Scroll down below the main editor window to add custom fields. Use one of the default names or add your own, along with a value. If you want this to appear on the front-end, you have to edit your theme’s code to reference it.
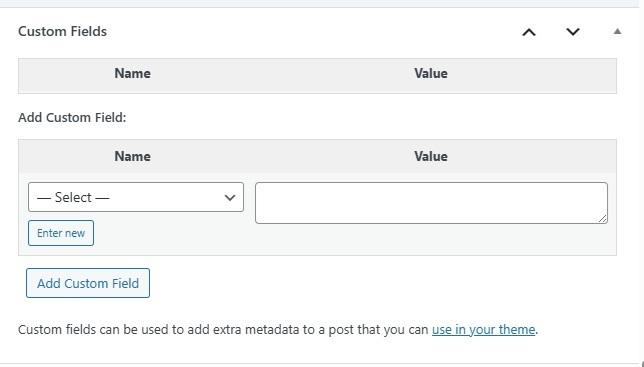
As you might already realize, this gets cumbersome quickly. Plus, if you’re not comfortable editing your theme’s code or you’d like to avoid repeating the process if you change themes, it’s better to just avoid the built-in method.
Most things are simpler in WordPress just by adding the right plugin, just don’t add too many. Custom fields is no exception.
Displaying Custom Fields
Simply setting up your custom fields in WordPress isn’t enough. You also have to display them on the front-end. As mentioned earlier, if you use WordPress’s built-in custom field feature, you have to add them to your theme and output them manually. It’s more technical and more difficult to manage.
With the right plugin, all you have to do is use the graphical interface to create, manage, and display your custom fields. Even if you change themes, the plugin helps you integrate your custom fields. This means less chances of mistakes and more consistency across your site, making it far easier to scale as needed.
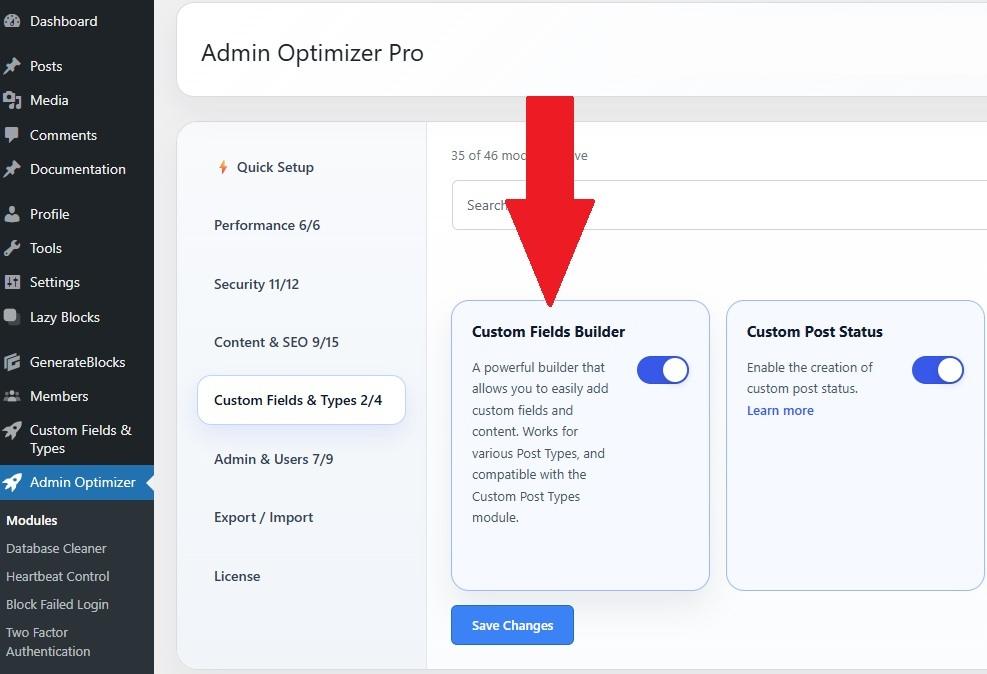
Let’s take a look at Admin Optimizer’s Custom Fields Builder module and how it works. Open Admin Optimizer in your dashboard, select Custom Fields and Types, and enable Custom Fields Builder. Click Save Changes when you’re done.
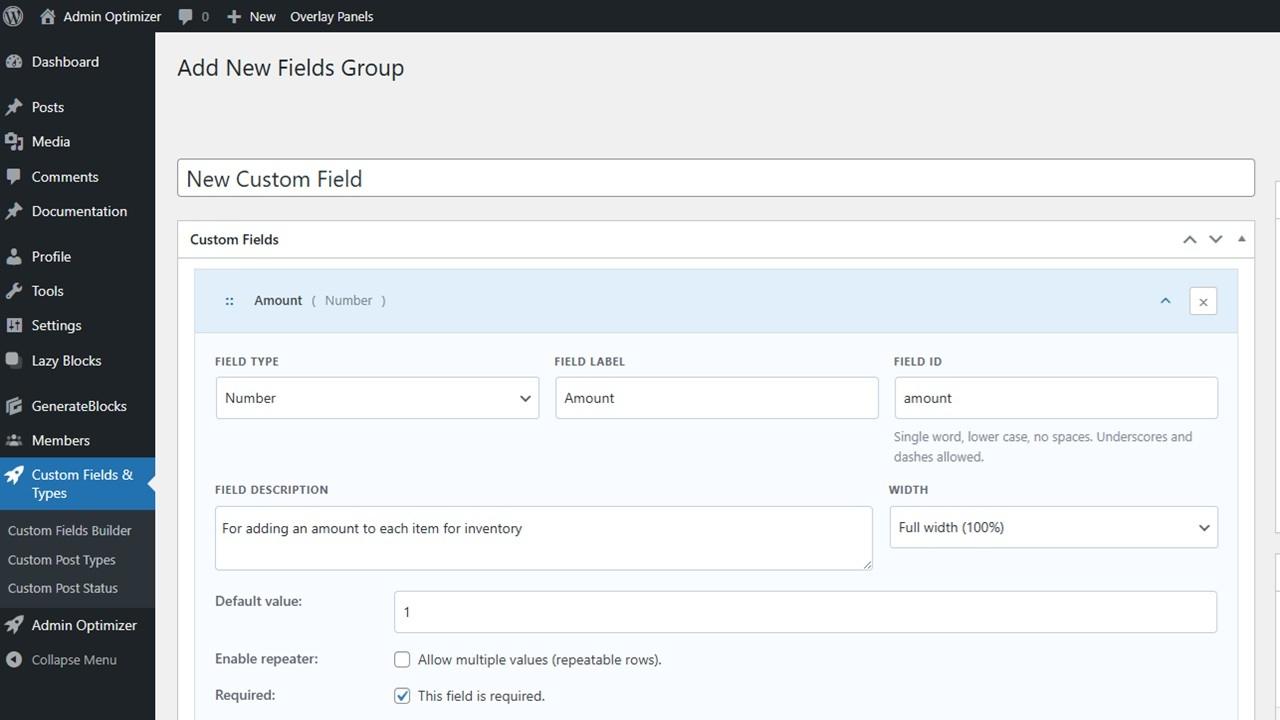
Select the new Custom Fields & Types section on your dashboard and choose Custom Fields Builder. Click Add New Fields Group at the top to start adding custom fields. Add your title, one or more fields, and even set up groups with conditions, such as and/or. You can create multiple rule groups as needed.
In the Custom Fields section, select an Untitled Field to change the field type, label, default value, and more.
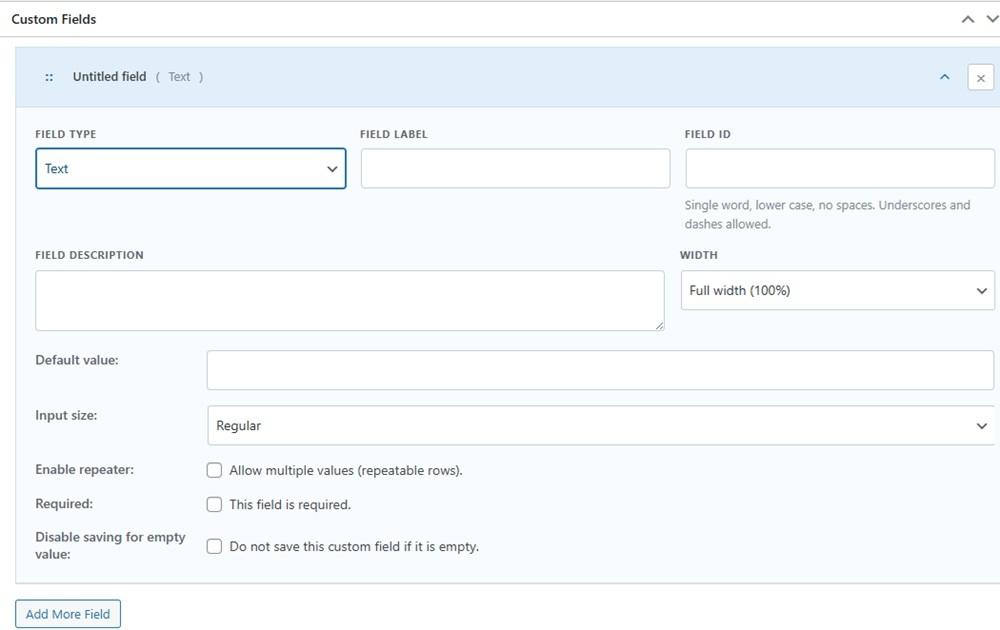
Set your Display Conditions to only show the field based on set rules, such as post types, taxonomy, user role, etc. Save you settings and you’re done. Then, edit the custom fields at any time by going back into the field settings from the Custom Fields Builder module.
When you’re starting with a small blog, it might still seem easier to do the manual method. If you want your site to grow, think about scalability now. Setting up an easier method to manage custom fields in WordPress makes your job significantly easier later on. Another thing to consider is adding custom post statuses to better manage your editorial workflow.
